

👏🎉 Yay! Yesterday we conquered Namespaces and Services! 💪💻🔗
What are ConfigMaps and Secrets in Kubernetes?
In Kubernetes, ConfigMaps and Secrets are crucial for storing configuration data and sensitive information, respectively. ConfigMaps hold configuration data as key-value pairs, while Secrets store encrypted data.🗝️🔒
In Kubernetes, ConfigMaps and Secrets are like treasure chests 📦 for your application's configuration and sensitive data.

🔧 ConfigMaps hold configuration data as simple key-value pairs, like a neatly organized toolbox 🧰. They help your application access settings and parameters without hassle.
🔒 Secrets, on the other hand, are like locked safes 🗝️, storing sensitive information such as passwords, API tokens, or certificates. They keep this data secure by encrypting it, ensuring only authorized access.
Think of ConfigMaps as the map 🗺️ guiding your application through its settings and Secrets as the hidden treasures 🏴☠️ safeguarded from prying eyes. Together, they empower your application to function smoothly while keeping its secrets safe! 🚀
Example: Imagine overseeing a spaceship (Kubernetes cluster) with various components (containers) requiring information to function. ConfigMaps act like a file cabinet, organizing information each component needs in labeled folders (key-value pairs). Meanwhile, Secrets are akin to a safe, safeguarding sensitive data (encrypted data) from unauthorized access. By leveraging ConfigMaps and Secrets, each component receives necessary information while keeping sensitive data secure! 🚀
Read more about ConfigMap & Secret.
Today's tasks: 📋👩💻
Task 1: Create a ConfigMap for your Deployment:
📝 Create a ConfigMap for your Deployment using a file or command line.
🔄 Update the deployment.yml file to include the ConfigMap.
    kind: ConfigMap
    apiVersion: v1
    metadata:
      name: mysql-config
      labels:
        app: todo
    data:
      MYSQL_DB: "todo-db"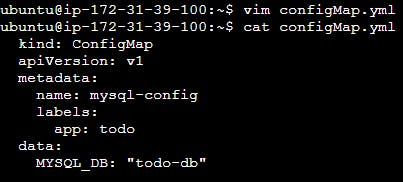
✅ Apply the updated deployment using the command: kubectl apply -f deployment.yml -n <namespace-name>.
🔍 Verify the ConfigMap's creation by checking the status in your Namespace
kubectl apply -f configMap.yml

kubectl get configmap

Task 2: Create a Secret for your Deployment:
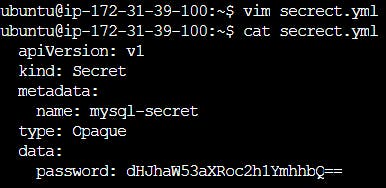
🗝️ Create a Secret for your Deployment using a file or command line.
🔄 Update the deployment.yml file to include the Secret.
  apiVersion: v1
  kind: Secret
  metadata:
    name: mysql-secret
  type: Opaque
  data:
    password: dHJhaW53aXRoc2h1YmhhbQ==
  # To Decode Base64 key
  echo "dHJhaW53aXRoc2h1YmhhbQ==" | base64 --decode

  # To Encode Base64 key
  echo "test@123" | base64

- ✅ Apply the updated deployment using the command: kubectl apply -f deployment.yml -n <namespace-name>.
  apiVersion: apps/v1
  kind: Deployment
  metadata:
    name: mysql
    labels:
      app: mysql
  spec:
    replicas: 1
    selector:
      matchLabels:
        app: mysql
    template:
      metadata:
        labels:
          app: mysql
      spec:
        containers:
        - name: mysql
          image: mysql:8
          ports:
          - containerPort: 3306
          env:
          - name: MYSQL_ROOT_PASSWORD
            valueFrom:
              secretKeyRef:
                name: mysql-secret
                key: password
          - name: MYSQL_DATABASE
            valueFrom:
              configMapKeyRef:
                name: mysql-config
                key: MYSQL_DB
kubectl apply -f deployment.yml

- 🔍 Verify the Secret's creation by checking the status in your Namespace.
kubectl apply -f secret.yml

kubectl get secrets

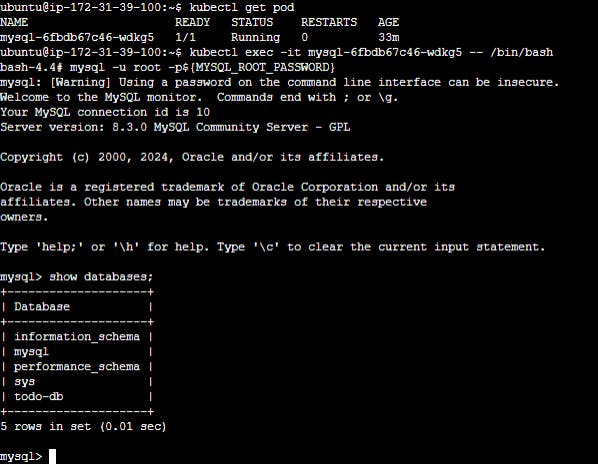
kubectl get pods

  apiVersion: v1
  kind: Service
  metadata:
    name: mysql-service
  spec:
    ports:
    - name: mysql
      port: 3306
    clusterIP: None
    selector:
      app: mysql
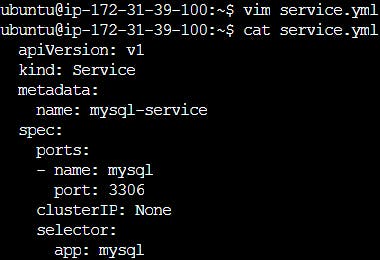
Now apply for the service, so that the pod is exposed.
kubectl apply -f service.yml

Now on the Worker Node install the MySQL client on it.
sudo apt install mysql-client-core-8.0
Install MySQL: If MySQL is not installed on your system, you'll need to install it. You can do this on Ubuntu using the following command:
 sudo apt update
 sudo apt install mysql-server
Start MySQL Service: After installing MySQL, the service should start automatically. If not, you can start it manually:
sudo systemctl start mysqlEnable MySQL Service: You can also enable MySQL to start on boot:
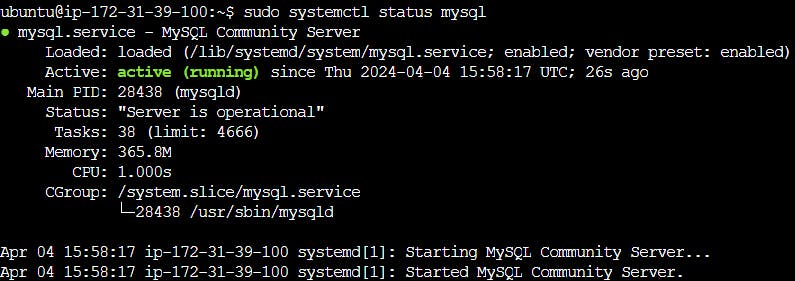
sudo systemctl enable mysqlCheck MySQL Service Status: Once MySQL is installed and started, you can verify its status:
sudo systemctl status mysqlVerify MySQL Socket: After starting MySQL, ensure that the MySQL socket file is created in the
/var/run/mysqlddirectory. If not, you may need to check the MySQL configuration file (/etc/mysql/mysql.conf.d/mysqld.cnf) and adjust thesocketparameter.Connect to MySQL: Once MySQL is running and the socket file is created, you can try connecting to MySQL again using the
mysqlcommand:mysql -u root -p
Keep learning and expanding your knowledge of Kubernetes! 💥🙌 #DevOps #Kubernetes #LearningJourney 🚀🔍