

🚀 Exciting news! 🌟 Day 27 of the #90DaysOfDevOpsChallenge is here, and we're taking our Jenkins Declarative Pipeline to the next level by integrating Docker! 💡 Get ready to enhance your CI/CD workflows with the power of Docker containers. Let's dive in together and level up our skills! 💪🐳

🛠️ Task-01: Creating a Docker-Integrated Pipeline
Setting Up Jenkins:
Ensure Jenkins is installed and running on your system. 🛠️

Make sure Docker is also installed and configured correctly. 🛠️

Creating a New Pipeline Job:
Log in to your Jenkins dashboard. 🖥️
Click on "New Item" to create a new project. ➕
Enter a name for your project and select "Pipeline" as the project type, then click "OK." ✔

Defining Stages in the Pipeline:
Inside the pipeline script block, define stages for different steps of your CI/CD process. 🛠️
In the
stage('Build'), use theshstep to execute the Docker build command: 🚀Replace node-todo-cicd with your desired image name and tag. 🏷️


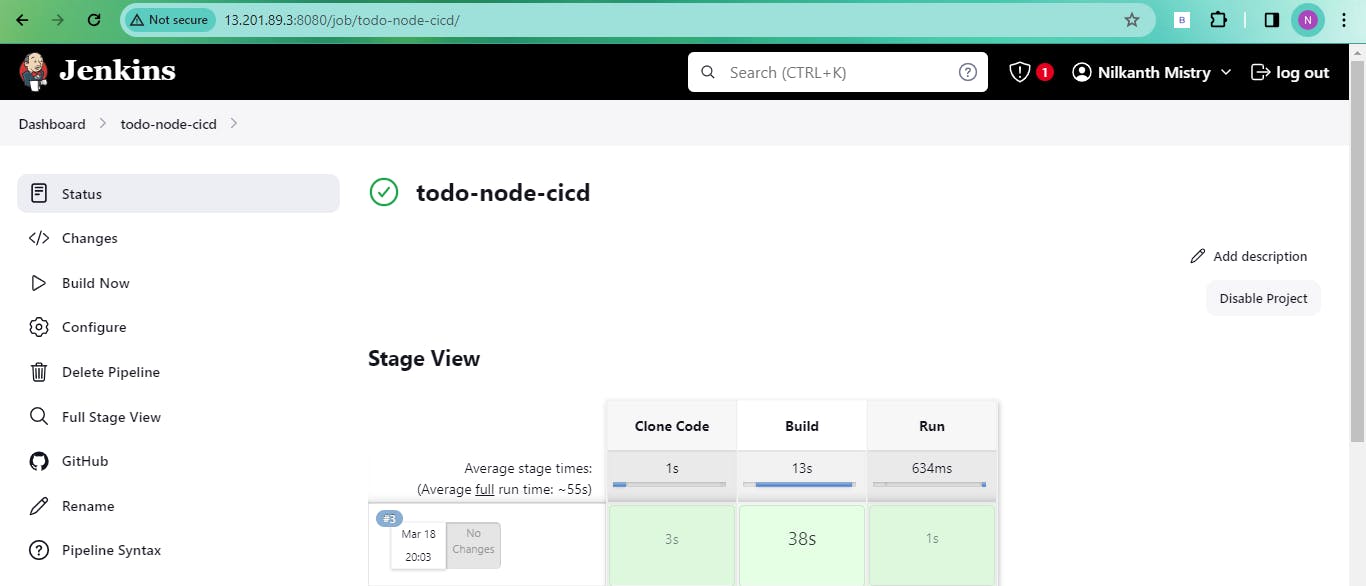
Committing and Running the Pipeline:
Here's your Jenkins pipeline script formatted in a clean and organized manner:
 pipeline {
     agent any

     stages {
         stage('Clone Code') {
             steps {
                 git url: 'https://github.com/Nilkanth1010/node-todo-cicd.git', branch: 'main'
             }
         }

         stage('Build') {
             steps {
                 sh 'docker build . -t node-todo-cicd'
             }
         }

         stage('Run') {
             steps {
                 sh 'docker run -d -p 8000:8000 node-todo-cicd'
             }
         }
     }
 }

👨💻 Bonus Tip: Apply this declarative pipeline approach to your previous projects for streamlined containerization.
🎉 How's your #90DaysOfDevOps journey going? Share your thoughts and experiences after four weeks of immersive learning! Let's continue to grow together and conquer new horizons in the world of DevOps. Happy Learning! 🚀🐋